tutorial

ANOTHER HEART IS BORN!

In my last post, I shared with you a stab at “hacking the code” with how to make a velvet pumpkin heart, which I initially discovered available for purchase via this company.  However, there were no online tutorials to be found for how to make one yourself.  These plush beauties are not cheap – a simple five inch heart fetching $39!

Additionally, while I was hacking away, and to my delight, I came up with a variation.

Here it is!

linda nelson at the createaerie

Just like the hack, begin with a rectangle piece of fabric.  Fold the fabric in half (nice sides facing each other)so that the two short ends meet.  Machine stitch a “V” at the folded edge, then cut off the little triangle shaped ends.  Next, trim off each top corner into a curved shape.  Now, pull the fabric halves away from each other and turn it right side out.  Proceed with the up and down stitching, cinching and stuffing just like in the hack.

linda nelson at the createaerie

This heart design doesn’t lend itself to pumpkin stems or sticks, but buttons and ribbons are perfect for finishing off the look.  A little brooch or tassel would work too.

linda nelson at the createaerie

linda nelson at the createaerie
linda nelson at  the createaerie

Okay, no more Valentine heart posts for this year – scout’s honor.  But, that doesn’t mean I won’t be creative.  It never fails that another crafty fixation will pop into my head.  Who knows what that will be.

ANOTHER HEART IS BORN! Read More »

OH, MY HACKING HEART

Hey there!  I bet you’re aware that those gorgeous and very popular velvet pumpkins on display in autumn have a cousin – the velvet heart.  Making one of those pumpkins is quite easy to do, and the internet is full of video and instructional tutorials to guide you along.  However, the heart… not so much.  Seriously, there are no videos or tutorials on how to make these little lovelies.  But, guess what?  They’re so stinking easy to make that a tutorial is virtually unnecessary, especially if you’ve had past success making the pumpkins.  After some mental dissection pondering, I came up with a “heartfelt” hack.  I think I’ve cracked the code…… or have come close enough.

What do you think?

linda nelson at the createaerie

So, here’s the “tutorial” –

linda nelson at the createaerie
Linda Nelson 2018

Simply cut a piece of velvet twice the length of its width, “up and down” stitch all the way around the perimeter roughly 3/4″ from the edge, cinch it up, stuff it, cinch it up again as snug as you can get it, tie it secure, then stick a stem in it.  That’s it!  A 10″x20″ piece of velvet will make a (approx.) 5″h x 7″w heart, not including the stem, of course.

After you’ve completed your little velvety creation, it’s time to move on to some other fabrics.

linda nelson at the createaerie

I also have a variation on these beauties that I will share with you very soon, so stay tuned……….

Now, go get creative!

OH, MY HACKING HEART Read More »

GETTIN’ GRITTY WIT IT

Do you know that a “pain in the a$$” is actually a real thing?  If you’ve ever experienced sciatica, then you most certainly know it to be true.  But, sciatica doesn’t just park itself at one of your “cheeks”.  No, it also takes a little joy ride down your leg and tortures you to no end.  It debilitates you.  It robs you of all energy.  It makes you miserable.  It is also your body’s way of telling you that your sensitive nerves may be getting pinched by your misaligned and compacted spine……. well, at least in my case. That’s what years of landscape gardening can do to the body.

My spine is responding well to the chiropractic adjustments I’ve been receiving, but I’ve had to limit the amount of time I spend sitting down; hence, I haven’t been at my computer much lately.  Yesterday’s spark of spinal relief prompted me to, of course, get creative.
So, here’s a gritty little faux cement tutorial just for you!
  • white gesso
  • white pre-mixed sanded grout
  • black acrylic paint
  • brown acrylic paint
  • soilless potting mix or peat moss
  • green Spanish moss
  • glue
  • paintbrush
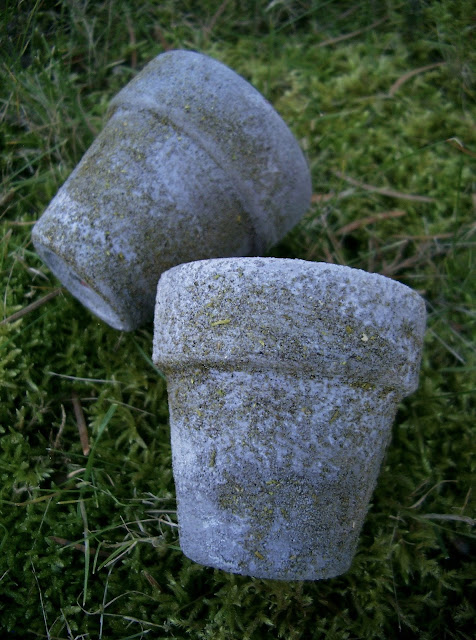
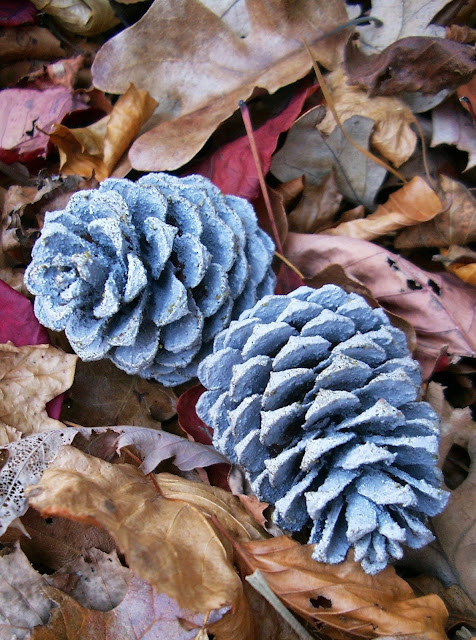
  • objects d’transformation (I chose a classic ball ornament, tiny clay pots and pine cones)
Mix two parts gesso to one part grout together in a small bowl.  Add a tiny drop or two each of black and brown paint to obtain a cement-like base color.  Paint the concoction onto your object, then let it dry.  Next, brush on (in a patchy-like fashion)some gesso tinted just slightly lighter than your base color, and let it dry.  Do not use any grout with this layer.  Then, using only the white gesso, dab some areas with your fingertip and smudge/blur it in to create the look of limescale residue.  Now, put a few pinches of Spanish moss and peat moss together into a coffee grinder and grind them up to create a coarse powder.  Brush some glue onto your object and sprinkle the powder onto those areas. When dry, buff the residual particles off with your hands.
linda nelson at the createaerie

That’s all there is to it.

Now, go grab something, make it gritty and get creative.

And, most importantly, take good care of your back.

GETTIN’ GRITTY WIT IT Read More »

CHALK PAINT-ISH: A QUICKIE TUTORIAL

Hey chalk paint lovers, how many DIY recipes of this kind have you tried?  Well, you can chalk this one up to super simple and successful.  This recipe is suitable for small scale work batches and requires only two ingredients – gesso and powdered pigment.  Not only that, the final step of buffing your object for a smooth, touchable finish is achieved with your hands!  Yep, no paste wax – just a vigorous rubdown using the natural oils from your hands.

linda nelson at the createaerie

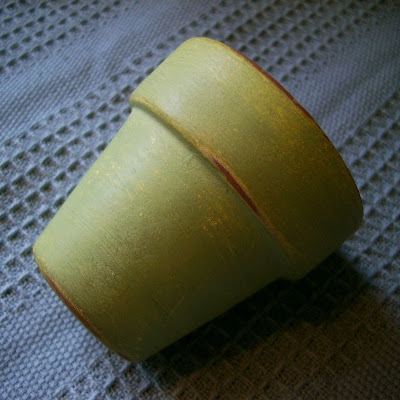
Doesn’t this clay pot’s surface look gorgeous?  It’s ready to join my symphony of spring decor.

To achieve this look simply mix a plop of white gesso with a sprinkling of powdered tempera paint.  I have the basic primary colors on hand (red, blue, yellow) and custom mix my own hues.  I made a lemony hue for the first layer, and a limey one for the second layer.  Apply paint with a brush and let dry before applying your next coat.  Sand the surface smooth with fine grit sandpaper or sanding block, then give it the rubdown.  That’s it!

linda nelson at the createaerie

In my next post I will share with you how to make chippy eggs using a variation of this recipe.  Stay tuned……….

linda nelson at the createaerie

And, get creative!

CHALK PAINT-ISH: A QUICKIE TUTORIAL Read More »

Scroll to Top