fabric

THIS ONE’S FOR YOU, LITTLE SISTER!

My sister had been doing some clutter purging, and passed a few fabric remnants on to me when I spent Thanksgiving at her home.  I’m a sucker for handouts like that.  A few days later my mom mentioned to me that she had a box of trim, lace and sewing notions stashed away in a closet, and asked if I was interested in the stuff.  Yes, mom.  Oh my……. I’ll need to prepare quite a bit for this future post because opening that box led to opening other boxes, and to opening up a running stitch of memories.  And, I can’t wait to share those memories with you!

Anyway, I’ve decided that I’m going to return some of the fabric to my sister.  Yep, I’m going to “gift” the piece of olive green velvet fabric back to her……. for Christmas.

Ta-da!
linda nelson at the createaerie

If you’d like to make a stuffed yo-yo Christmas tree, you will need –

  • a sister who’s getting rid of about 1/2 yard of fabric
  • button thread (it’s much more durable than regular thread)
  • a needle
  • round templates in graduating sizes (I used pot lids dishes, etc…)
  • beanbag fill (rabbit/guinea pig bedding shavings would also work!)
  • a dowel or metal rod about 3/8″diam. (the length depends on how tall you make your tree)
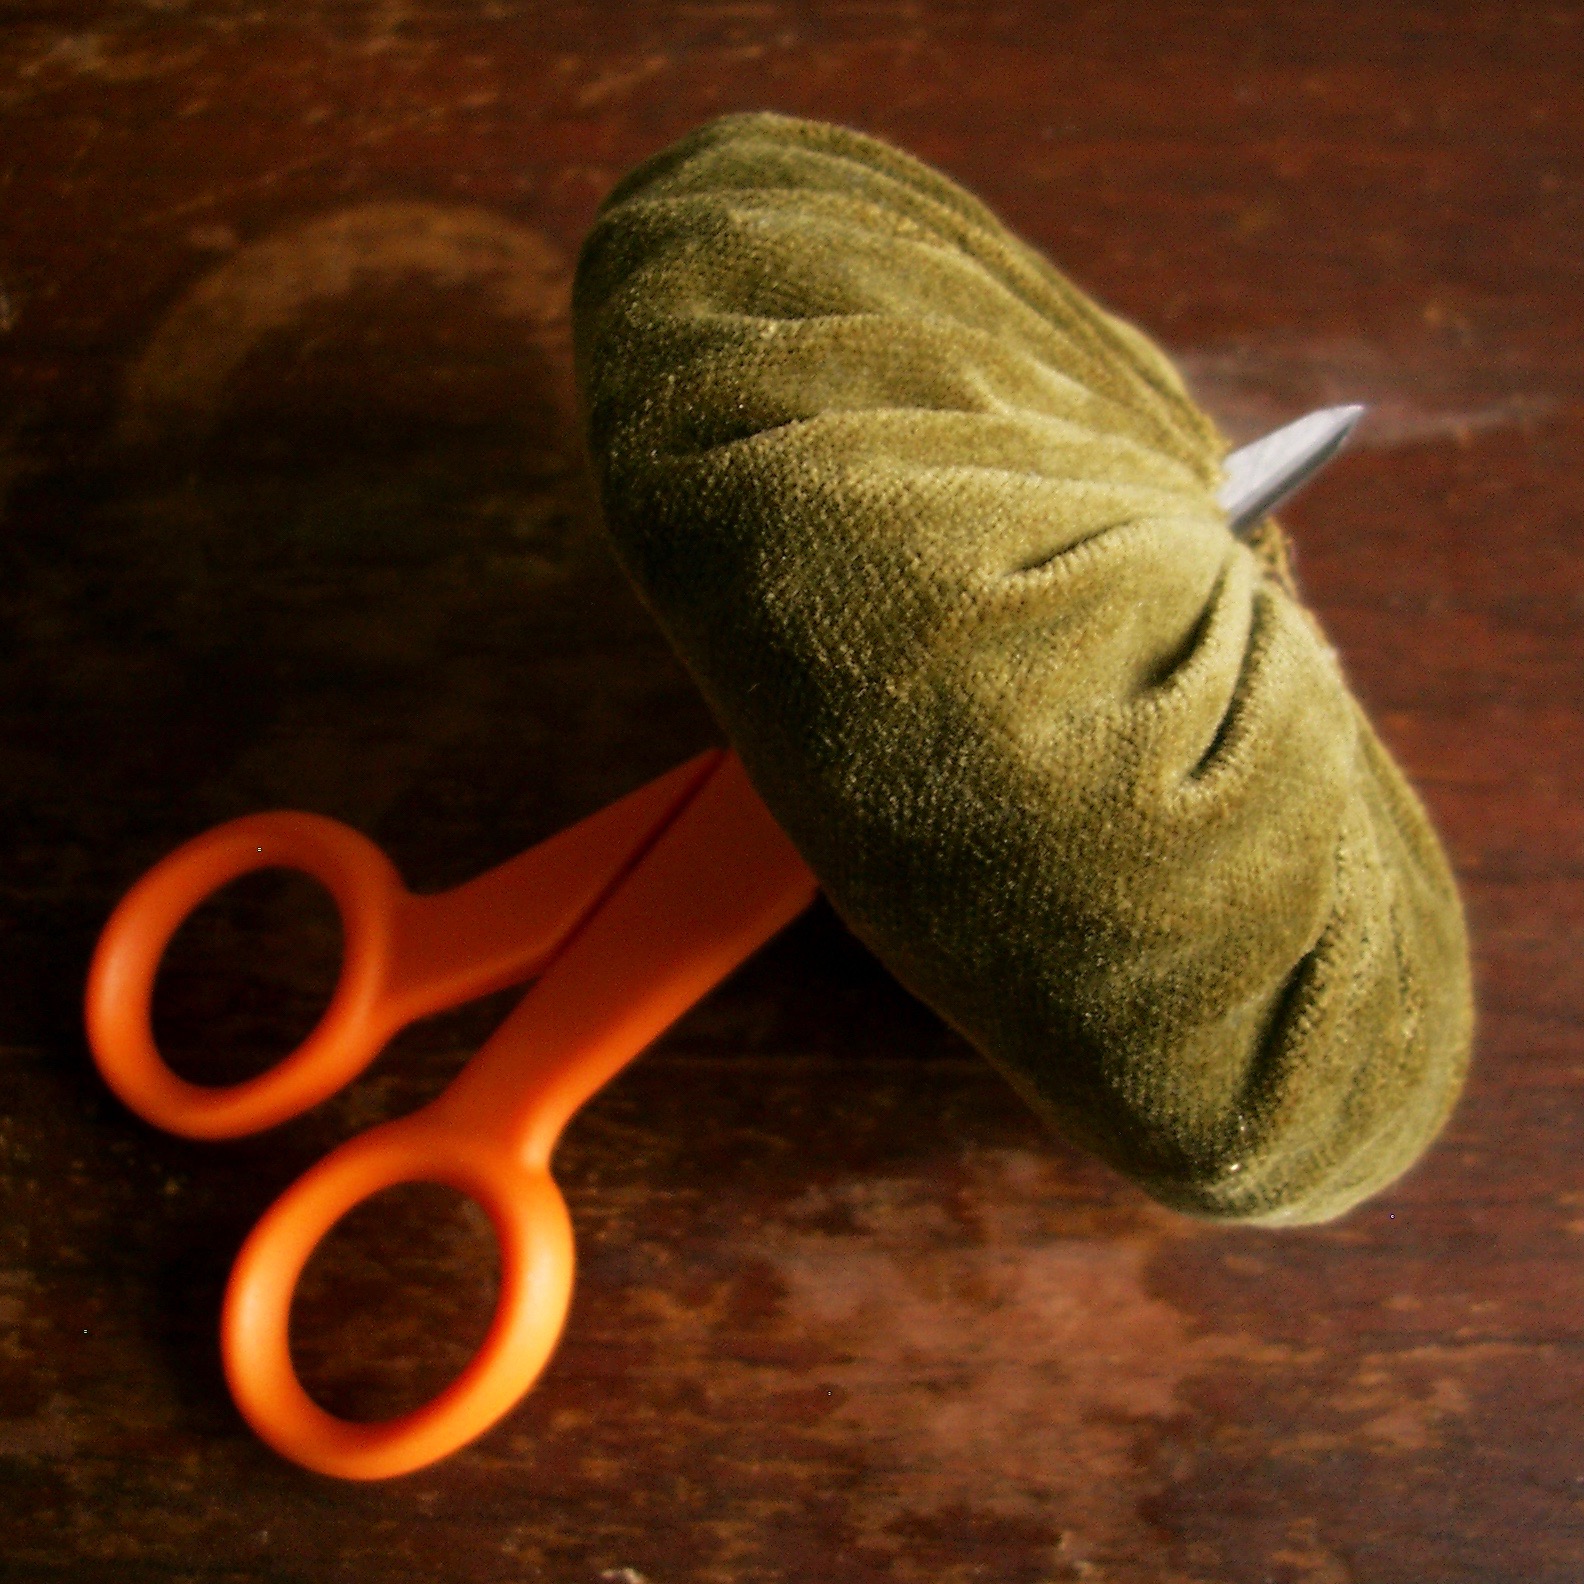
  • a small pair of pointy scissors
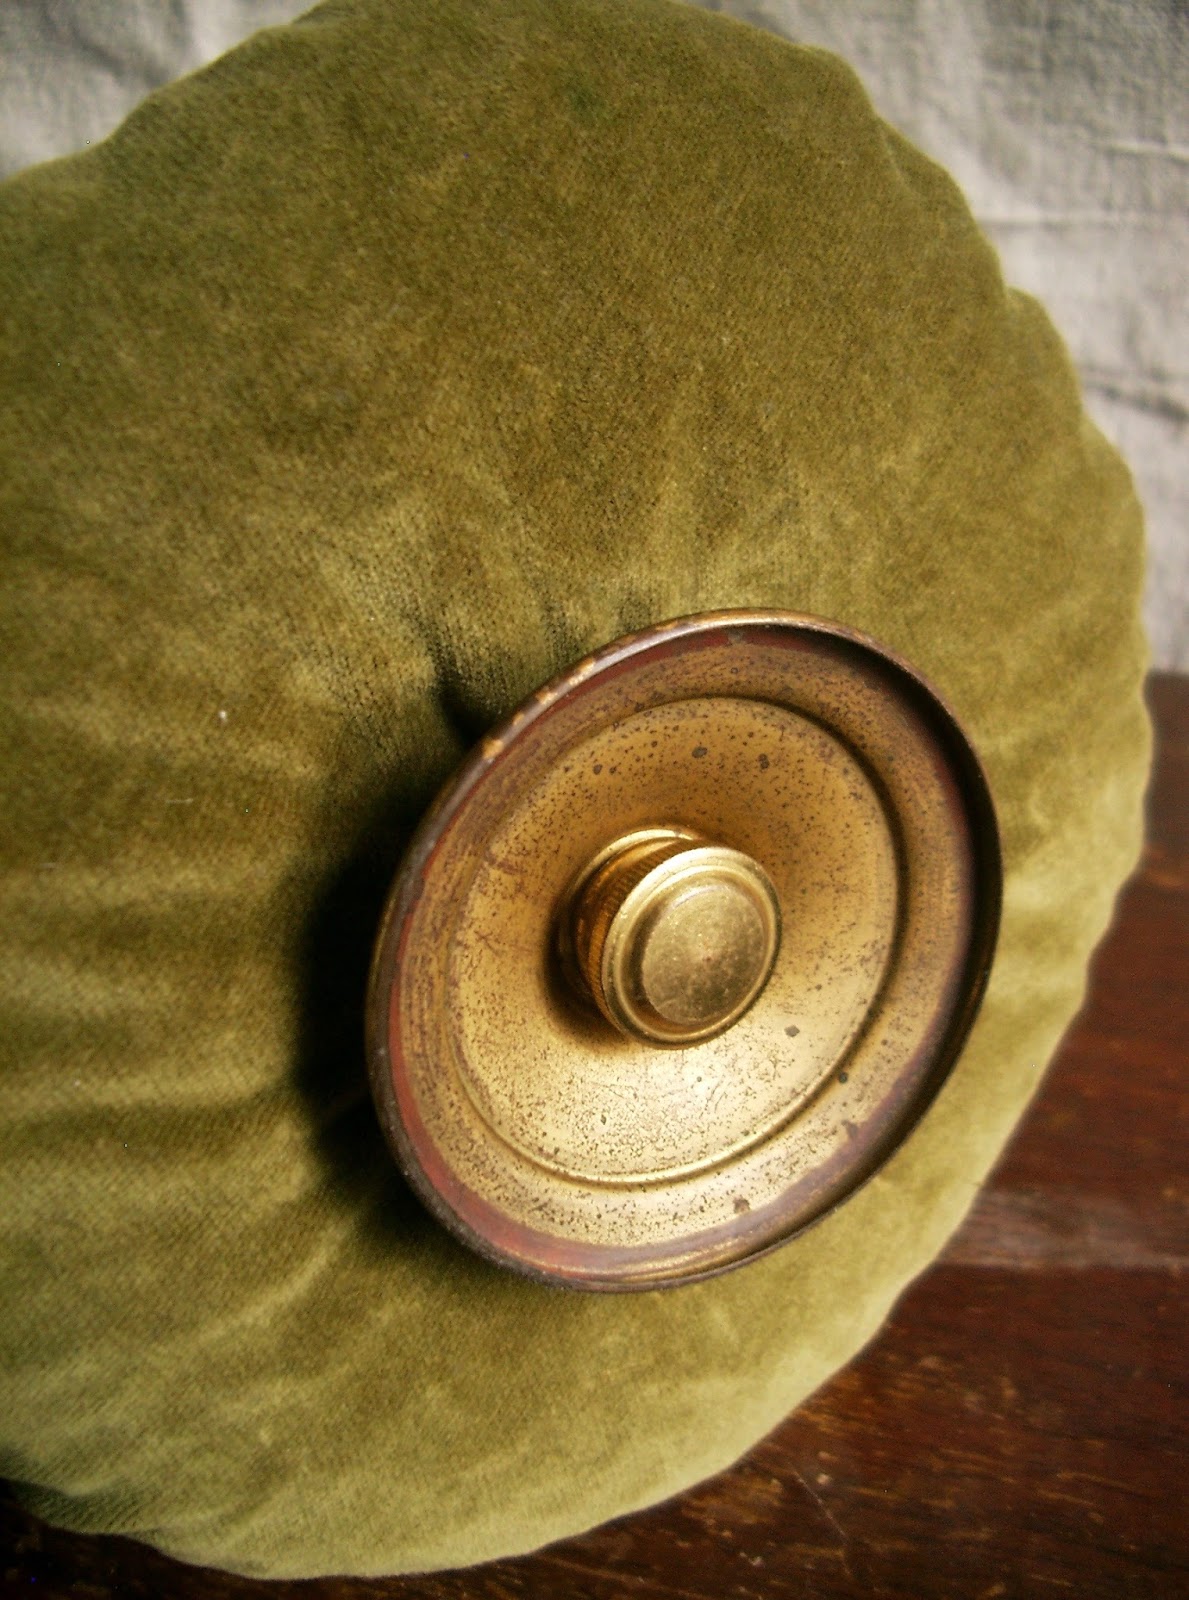
  • tree base and tree topper (*see note)         

Stitch, stuff, cinch and tie off all your yo-yo’s.  Using the pointed end of the scissors, poke a hole through the center of each yo-yo making sure the hole is wide enough to feed the dowel/rod through. Feed all the yo-yos onto the rod (cinched side facing up). Now, it’s time to add your topper and base, though I must let you in on a little secret –

* I used old lamp parts to assemble my tree, but I’m confident that if you don’t have any lurking around your home, you will successfully finish the assembly some other imaginative and resourceful way.  Just get creative!

THIS ONE’S FOR YOU, LITTLE SISTER! Read More »

DOES YOUR BFF KNOW ABOUT FFHFF?

Well, she(or he) should.  And, so should you.

And this is what led me to my “acronymonious ‘aha'” moment.

You see, every year at income tax time I get a strong urge to purge.  And, good thing I did because I found some filed receipts and product manuals for things I no longer owned, or that were so old that having records for them just didn’t make any sense.

Two hours later, I had a nice big pile of no longer needed documents destined for the shredder, and that satisfied feeling of having de-cluttered my office.

In addition,  I also had a few tattered hanging file folders.  Ugh!  Might as well shred or just recycle them, too.  But, before I do, I’d better remove the metal hangers.

Now what?  Buy more folders?

No!!!!!!  I’ll make FFHFF.

FABULOUS.  FABRIC.  HANGING.  FILE.  FOLDERS!

And, they’re so easy to make!

Simply cut out two 20.5″x12.25″ pieces of fabric and place them together with right sides facing each other.  Sew a 1/4 inch seam all the way around, leaving an opening just big enough to turn your piece right side out.

Iron press the entire piece, then press a one half inch fold at each short end.  Machine stitch both folded ends down.

Slip the metal hangers through the folds, and you’re done!

Now, my version is the stripped down model, but you could easily add interfacing to make them stiffer, or even create a flat bottom (this would require you to initially make the length longer than 20 inches).  The point is that it’s a great way to use some of that pretty fabric you may have stashed away for replacing your old file folders as they become worn out.  The fabric ones will last forever, and you can even toss them in the wash.

There you have it.

Now, go make some FFHFF!

DOES YOUR BFF KNOW ABOUT FFHFF? Read More »

DANCING WITH LEFTOVER LINEN AND CARDBOARD

In my previous post , I was doing the dance of deconstruction with an old linen tablecloth.  Well, I had enough fabric leftover which allowed me to dance a little bit more.

©linda nelson 2015

Then I danced again, only this time with some corrugated cardboard, and made these.

©linda nelson 2015
©linda nelson 2015

You can dance, too.  Just get some thick corrugated cardboard and create a shape template(I love drawing hearts).  Cut out four pieces of the same shape, then glue them together.

©linda nelson 2015

Lightly sand around the edges(or not)to smooth them out.  Slap on a couple coats of gesso; it serves as an ideal primer and makes the piece strong and sturdy.  After that, it’s up to you how you’d like to further embellish your piece.

©linda nelson 2015
©linda nelson 2015

I really like the exposed texture of the corrugated edge; it adds a rustic richness(if that ain’t an oxymoron!).  The layers of gesso make the piece tough as nails.  Don’t omit that step.

©linda nelson 2015

©linda nelson 2015

There you have it.

Now, start dancing and get creative.

DANCING WITH LEFTOVER LINEN AND CARDBOARD Read More »

Scroll to Top