grow

SOW BY NUMBERS

The southeast coast of New York has been blessed with a string of spring-like days lately, and I’ve been taking full advantage of it.  What a gift!  I’ve been able to turn my compost pile, do a bit of garden bed grooming, and seed sow a few cold hardy crops – all without being bundled up in a snowsuit.  Sweet!  Kovacs, my foster cat, looks on from the comforts of my office as I toil away.

linda nelson at the createaerie

We’re all familiar with the classic “Paint By Number” kits, right?  Well, today I’m sharing with you, “Sow By Numberâ„¢”, a very practical method I created for labeling seeded vegetables and flowers that’s as easy as 1-2-3!

What you’ll need is –

  • a bunch of landscape fabric anchor pins
  • a plastic placemat with printed decor on only one side
  • permanent magic marker
  • a clipboard, paper and pen or pencil
  • scissors and a hole punch

Cut your placemat into a bunch of 1″x3″ strips.  Punch a hole at the short end of each strip, making sure the hole is big enough to slip one prong of the landscape pin through the hole.  Grab a label, write a number “1” on it and drive the pin into the soil at the site of where you sowed your seeds.

linda nelson at the createaerie

Log the number “1” onto your paper chart along with the seed type and sowing date.  Your next label will be number “2”(obviously), and you will anchor it in a the site of a different type of seed.  Continue this process for each type of seed variety that you sow.  If you plan to succession sow a particular variety, label your marker with a letter next to the number and catalog those dates on your chart.

linda nelson at the createaerie

What’s nice about this method is that, no matter what you plant, the numbered labels can be used over and over again every year; simply create a new chart for each season.  Your labels won’t blow away, either; the anchor pins keep them in place all season long.  And……… you don’t have to painstakingly fit your descriptive scribble on a tiny little marker label.  Now, THAT’S sweet!

Hey, did you know that window wells make perfect little cold frames for growing potted cool crop/winter sown seedlings?  They do, try it!

linda nelson at the createaerie

Ahhh….. now it’s time to sit back and watch things sprout.

linda nelson at the createaerie

SOW BY NUMBERS Read More »

HARVESTS FROM THE CRAFTY PUMPKIN PATCH

I didn’t grow pumpkins in my garden this year, but that doesn’t mean I was without harvest.  No, I grew mine in a crafty sort of way, and my bounty was quite the menagerie.

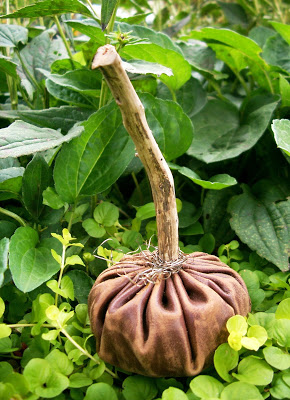
I grew a distressed leather pumpkin……….
leather pumpkin
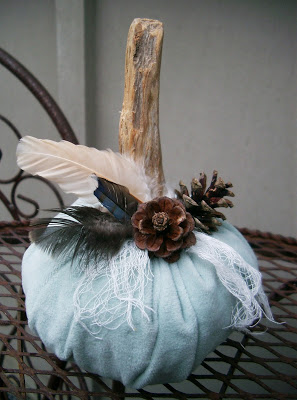
an ultra-suede one………..
ultra-suede pumpkin
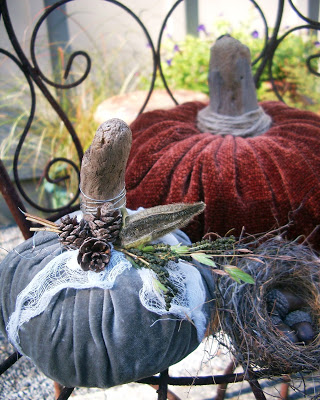
a chenille one, and some velvet ones, too.
chenille and velvet pumpkins
And, for my friend, I grew some furry, glitzy and glamorous ones.
glitzy glamorous pumpkins

Not too shabby a harvest, wouldn’t you say?  They were very fun to grow.  I love all the pumpkins you crafty folks have been growing, too.  There are so many fabulous posts out there.  Very, very pretty!

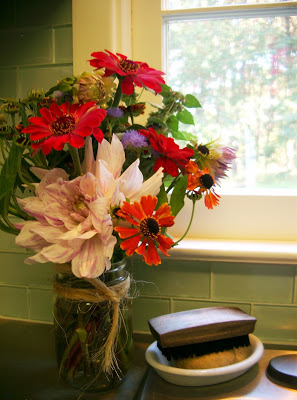
The pickings are slim with regard to harvesting the remainder of my summer flowers, but I managed to throw together this little arrangement; I’ll enjoy it for as long as I can.

 summer flower harvest

My garden tchotchkes have all been stored away, save for a few things here and there.  I always keep this little bistro set out; it looks so pretty surrounded by snow, especially when the birds come to feed.

bistro set

Happy harvesting!

HARVESTS FROM THE CRAFTY PUMPKIN PATCH Read More »

COMMON HERB SENSE: A FEW PRACTICAL HERB PLANTING TIPS

I’m sure many of you are thinking about which culinary and sensory provoking herbs you’ll be growing this year.  But, have you given thought to the design aspect of planting those delectable favorites?  Maybe you’re the proud owner of a meticulously pampered potager, or you’re just a natural with knowing how to artistically plant up your herbs.  That’s great; keep doing what you’re doing.  But, some of you may be less confident with how to incorporate herbs into your patio garden decor.  Here are a few tips to consider:
  • If your property is zen-like or minimalistic, incorporate your herbs in the same fashion.  Planting them in farm or country, cottage cutesy styled containers will disturb the overall design.  Likewise, if your patio furniture is large and architectural in design, your potted herbs will successfully complement your outdoor living space if they are planted in boldly architectural looking containers.  Is your abode an old farmhouse?  I’m sure you can figure out what I would suggest.
  • Don’t be fooled and smitten by nonsensical container planting practices, such as growing herbs in teacups or dainty little wicker baskets.  Even small herbs, such as thyme, will fare better in a bigger pot (not too big, though).  If you absolutely love and must have those Thumbelina sized vessels, then place them in a slightly less sunny spot.
  • Divide your ground grown perennial herbs, such as oregano and chives, each season.  Give your divisions away to family and friends, or toss them into the compost pile.  A two foot diameter clump of oregano is seriously unattractive, no matter how much its pungent aroma takes your olfactory senses back to your grandma’s homemade pasta sauce.  Besides, it will perform better.
  • Some shrub herbs, such as lavender, sage and rosemary, eventually become woody, gangly and lose their overall visual appeal and vigor.  That’s when it is time to bid them farewell and replace them with new ones.  It is what it is.
  • Be curious.  Peruse the herb section of your local garden center and choose a few herbs that you have never grown before, even if it is just because they look pretty or smell nice.  You don’t have to use them to enjoy them.
  • Speaking of looking pretty…. yes, you can plant herbs together with annual and perennial flowering and foliage plants in the same pot.  Choose an appropriately sized container, then go for it.  It will look fabulous.  Plus, you’ll gain the reputation that you’re quirky and love living on the edge.
  • Though purists may instruct you otherwise, it’s okay to plant a variety of herbs in one pot.  The tradeoff, however, is that by mid season the plants will shade and choke each other out.  Your harvest will not be as prolific and may be susceptible to disease and fungus.   Either keep the design arrangement simple or regularly trim and harvest to keep your herbs within bounds.
The inspirational herb garden design tips to discover are endless.  I hope these few practical ones I’ve shared can help you get started.  Happy herb planting!

©linda nelson 2014

COMMON HERB SENSE: A FEW PRACTICAL HERB PLANTING TIPS Read More »

PHALAENOPSIS ORCHID REBLOOM

© Linda Nelson 2013

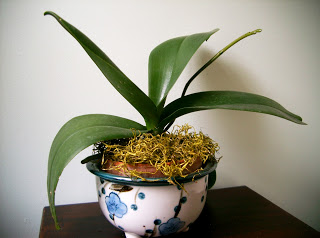
Have you ever purchased a phalaenopsis orchid or received one as a gift, but have never gotten it to rebloom?  The one shown will be in its glory for the third consecutive year this April.  Here are my tips for reblooming success –

  • When your phalaenopsis orchid drops its last bloom snip the entire stem off at its base from where the shoot first emerged.
  • Continue with your watering schedule, but incorporate a liquid fertilizer application about once a month.  There are orchid specific fertilizers out there, but I have success with good old-fashioned Miracle Gro.  Your orchid should send out a flowering shoot in about one year.
  • Hate to wait that long?  Stagger your orchid purchases to one every three months until you have a total of four plants.  Place the blooming one out for display while tending to the others in “waiting”.
  • Repot about every two or three years.  I use a mix of sphagnum moss and orchid bark.
  • These particular orchids like bright light, though not direct sunlight, nor do they like soggy roots.  With the right amount of light the leaves should be a light to medium shade of green.  Dark green leaves indicate not enough light; very light green leaves with red undertones indicate light that is too strong.

PHALAENOPSIS ORCHID REBLOOM Read More »

Scroll to Top